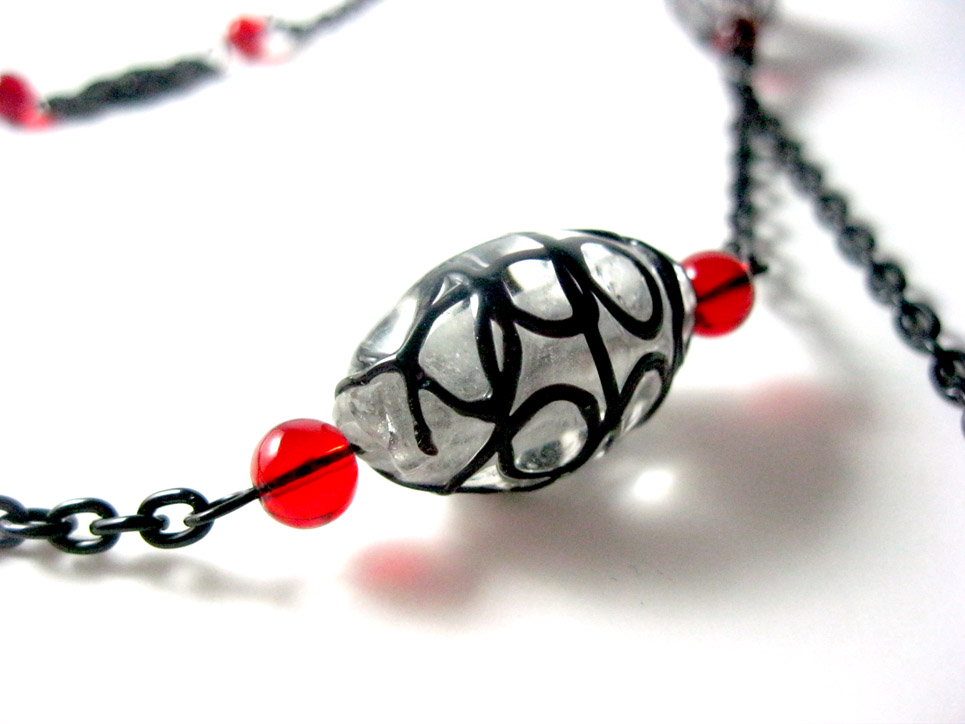
I posted earlier about Cousin sending all of us ambassadors a lovely box of goodies for us to create a Halloween themed project for the month of October. I ended up making two different items. Below is the second item I created. It's a lovely black and red, Goth style necklace. Make sure to visit the
Cousin website to see all of the ambassadors' amazing designs for this month's project. Complete instructions for this piece can be found on
their site and below.
Supply List
Jewelry Basics

34713087 – Glass Beads: 85 pc 6mm Round Red
34708423 – Metal Beads: 3 pc Metal Bead Black Lace Spacer
34718004 – 100 inch Small Oval Chain in Black
37450212 – 17 inch Black Metal Filigree Connectors
36127150 – 9" Clear/Black Glass Ovals
34719103 – Findings 145 pc Starter Pack in Black
Tool List:
Round Nose Pliers
Chain Nose/Needle Nose/Flat Nose Pliers
Parrot Beak Memory Wire Cutters (for cutting chain)
Instructions for Necklace: Make all your connectors and dangles at
the same time. Cut all the chain at the same time. Disassemble the filigree
strand. We are only using the filigrees
not the beads. You will be using the
smallest jump rings from the Starter pack as well as the extender chain.
Cut the following sections of chain:
Ten 12 link sections
Two 15 link sections
Two 17 inch sections
Two 40 link sections (5 inches each)
One 79 link section (10 inches)
One 3 inch section from the extender chain
Make 11 Red Bead Connectors: (will be referred
to as RB Connectors)
Thread a red bead onto an eye pin. Bend the pin to form a
right angle. Cut the pin approximately 1/4 inch beyond the bead. Use the round
end of your pliers to grasp the end of the pin and curve the pin by using a
rolling motion to fold it over a single round prong. You may need to release
the pin and continue the rolling motion again.
Make 2 Red Bead Dangles: (will be referred to
as RB dangles)
Thread a red bead onto a head pin. Bend the pin to form a
right angle. Cut the pin approximately 1/4 inch beyond the bead. Use the round
end of your pliers to grasp the end of the pin and curve the pin by using a
rolling motion to fold it over a single round prong. You may need to release
the pin and continue the rolling motion again.
Make 2 Red Bead & Clear/Black Oval Bead Connectors: (will be referred to as RB/CB connectors)

Thread a red bead, a clear/black oval bead and another red
bead onto an eye pin. Bend the pin to form a right angle. Cut the pin
approximately 1/4 inch beyond the bead. Use the round end of your pliers to
grasp the end of the pin and curve the pin by using a rolling motion to fold it
over a single round prong. You may need to release the pin and continue the
rolling motion again.
Make 3 Red Bead & Black Lace Spacer Connectors: (will be referred to as RB/BL connectors)
Thread a red bead on to a eye pin. Thread the eye pin through one hole of the
spacer and then add another red bead. Bend the pin to form a right angle. Cut
the pin approximately 1/4 inch beyond the bead. Use the round end of your
pliers to grasp the end of the pin and curve the pin by using a rolling motion
to fold it over a single round prong. You may need to release the pin and
continue the rolling motion again.
Repeat for the second hole of the spacer.
Construct 3 Red Bead and Filigree Connectors:
(will be referred to as RBF connectors)
Take two RB connectors and attach to each end of a metal
filigree connector by opening one loop of the RB connector and threading the
filigree connector onto the pin. Close
loop. Repeat for opposite side.
Construct 1 Red Bead and Filigree Dangle:
(will be referred to as RBF dangle)
Take one RB connectors and attach to one end of a metal
filigree connector by opening one loop of the RB connector and threading the
filigree connector onto the pin. Close
loop. Attach an RB dangle to the
opposite end of filigree. Set aside.
Using the smallest jump rings from the Starter pack, connect
the RB/BL connectors together forming a strand. Note: Use a side to side twist motion to open the
jump ring and to close it back. It's
easiest to use two pairs of needle nose pliers. If you have one pair, you can
hold one side with your fingers. If there is a gap, close it by moving the
sides up and down pressing gently together. The ends should overlap then snap
together tightly so the tension of the metal will hold the gap closed.
Attach one section of 12 links to each free loop of the
RB/BL connector strand at both ends via jump rings. Attach a RB connector to both sections of
chain by opening the loop from side to side. String on another 12 link section
and close the loop. Open the free loop of the RB Connector and attach another
12 link section of chain. Thread on one 40 link section of chain and close loop
of RB connector. Open free loop of the RB connector just added and attach one
15 link section. Repeat on opposite side of RB/BL connector strand.
Use a jump ring to attach a lobster claw clasp from the
starter pack to one end of the chain. On
opposite side, attach using a jump ring, the extender chain. Attach one RB dangle at the end of the
extender chain by opening the loop from the side and threading the pin through
the last link of the extender chain. Close the loop.

At the end of one of the free 12 link sections, attach one
of the RBF connectors and another 12 link section of chain. Add another RBF
connector and another section of chain. Connect the free chain and the chain
just added with the last RBF connector.
At one end of the 40 link section of chain, attach a RB/CB
connector. At the free loop of the RB/CB connector, attach one end of the 79
link section and a 17 link section of chain. Attach another RB/CB connector and
the next 17 link section of chain. Connect the 17 link chain to the last RB/CB
connector and other end of the 79 link piece. Then connect the free loop of the
RB/CB connector to the end of the other free 40 link section of chain.
Find the center point of the 79 link section. Open top loop
of the RBF Dangle and thread it through the center link of the chain. Close
loop.
Main body of necklace should fit snuggly to the neck like a
collar.
Earring Instructions: Use ear wires from Starter pack
and smallest jump rings. Using the
instructions from above, make 2 Red Bead Connectors, 2 Red Bead Dangles.
Construct 2 Red Bead & Filigree Dangles. At top loop of RBF connector,
attach a jump ring. Thread loop of ear wire onto the jump ring and close the
ring. Repeat for other earring.
 While I sorted my supplies, I ran into a problem. The color of some of the pearls were off. I had ordered dark blue/navy and what I received was dark teal/green color. Turns out I had a mislabeled batch. Oops.... I reached out to one of my contacts there at Cousin/Prima Bead and he quickly sprang into action to make sure the other pearls were labeled correctly for other customers and find me a perfect match for what I wanted. Within a few days, I received my new goodies. But the fact I had off colored items didn't stop me from creating a beautiful piece from the pearls. So now I have two necklaces for Cousin to choose from. Below are the progression of each necklace from idea conception to finished beauty.